Top 6 useful software for network cameras
What are the useful support tools for network cameras? This article lists 6 useful software/tools recommended by experts from Messoa. Using these software/tools can help users design bandwidth and storage to meet their video surveillance requirement and troubleshoot efficiently when they encounter any technical issue.
VLC Media Player
VLC is a free and open source cross-platform multimedia player and framework that plays most multimedia files as well as DVDs, Audio CDs, VCDs, and various streaming protocols. In our past article, we wrote how to play camera RTSP video stream on VLC media player and QuickTime player.
Download and install VLC Player from http://www.videolan.org/vlc/
In addition to playing camera RTSP video stream, the VLC media player can help you to analysis video stream. Especially, when the network camera performs poorly with an NVR, such as missing frames or corrupt images, we suggest using VLC to clarify the performance of the camera stream and not confusing with NVR decoding capability.
Instruction
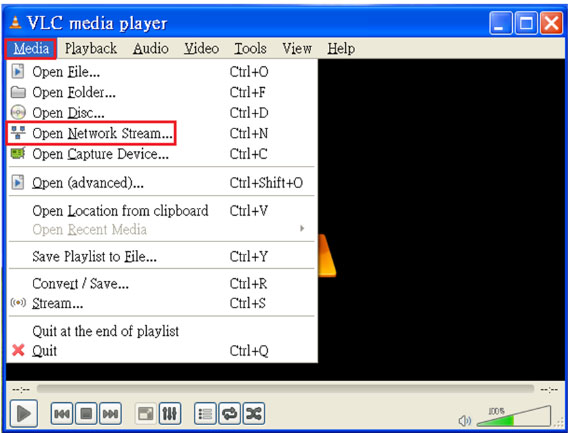
1. Go to [Media], select [Open Network Stream] from the Media menu.
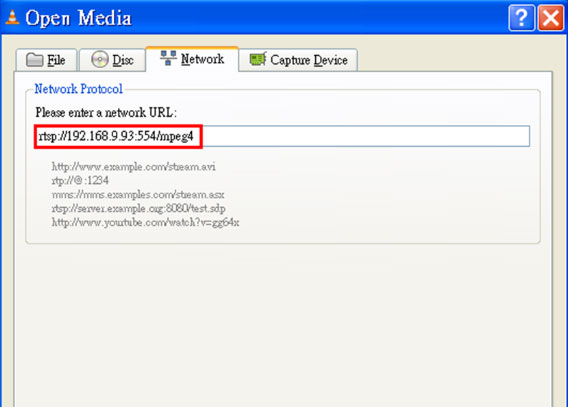
2. Select [Network] tab on the [Open Media] dialog window. Type the network camera's RTSP URL in the the text box, and click [Play], and you will see the image with the RTSP stream. You can find the default RTSP URL of the network camera from the instruction manual.
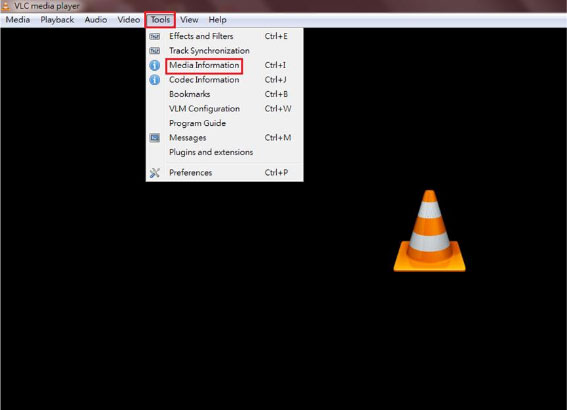
3. Select [Tools] > [Media Information] from the tool menu, then check if the video corrupt issue can be reproduced in VLC media player.
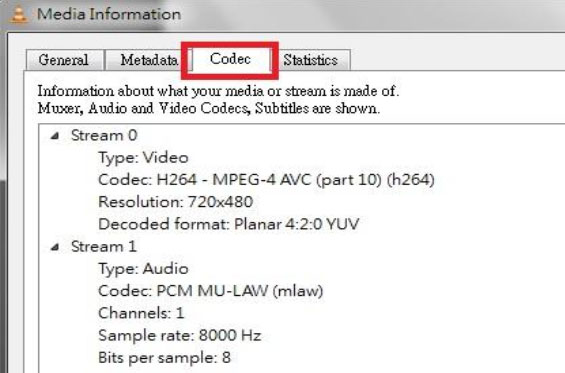
4. The [Media Information] dialog window is displayed with the [Codec] details tab. The video codec of the playing stream is shown.
5.Click the [Statistics] tab to see the bit rate and frames information.
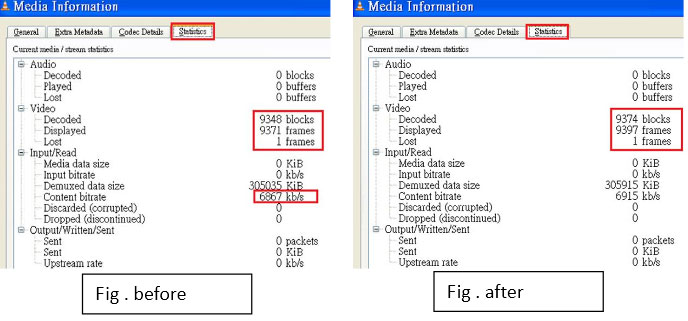
6. VLC player refreshes the displayed frames every second, and the exact frames per second can be attained by calculating the difference in the decoded blocks between each second. For example, 9374 minus 9348 equals to 26 FPS. Then check if frame missing issue can be reproduced in VLC.
Wireshark
Wireshark is a free and open-source packet analyzer, It's used to filter, dump and analyze the packet for troubleshooting network issue.
When a network camera disconnects with an NVR, we would suggest using Wireshark to capture the packet info between the camera and the NVR, so the networking issues, such as connection protocol type and connection status can be traced and clarified.
Download Wireshark software: http://www.wireshark.org/
Packet Confirmation
1. Select [Capture] from the main menu, then choose [Interfaces] in the drop down menu. A list of available network cards will be displayed.
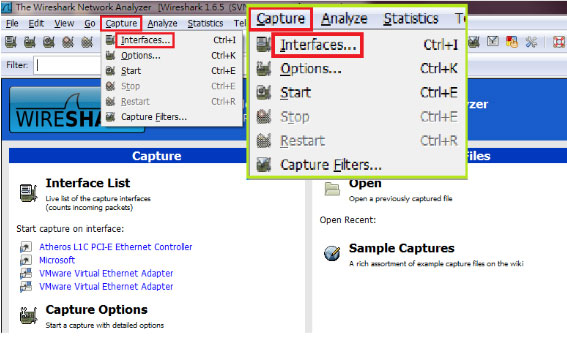
2. Clarify which interface (NIC card) and IP that is sending/receiving packet.

3. Enter the IP address of camera in the Filter text box, and selct the NIC of sending/receiving packet, then click [Apply].
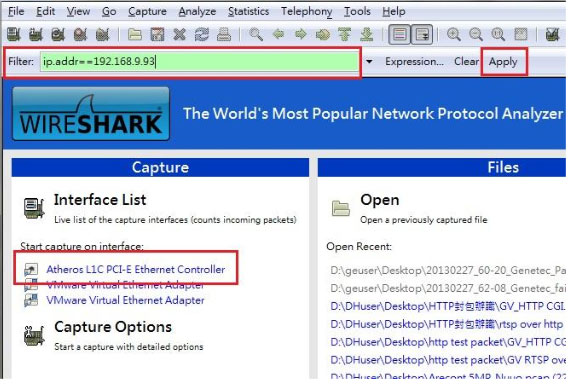
4. You may predefined the rule in [Capture Filter] button, or just specify the desired rule in the text box.
Example: Entering ip.addr==192.168.9.93, only the packet sending and receiving through camera of IP 192.168.9.93 will then be captured.
5. Here is an example of capturing TCP packet.

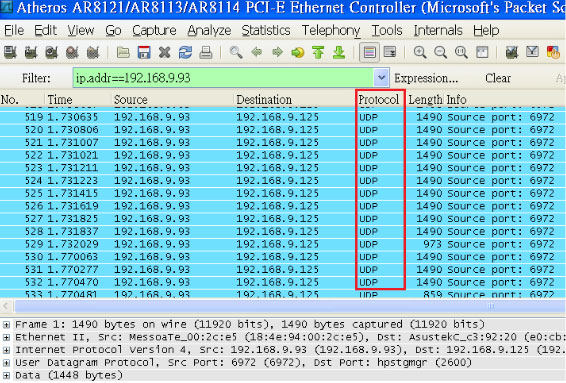
6. Here is an example of capturing UDP packet.
Connection Confirmation
1. Preparation: Run the NVR application without any camera connection, set a camera in IP "192.168.5.14" standby.
2. User Wireshark to capture packet from camera to make sure the camera is broadcasting packet.

3. Add camera in IP "192.168.5.14" to NVR.
4. Use Wireshark to capture the conversation packet between NVR and Camera.
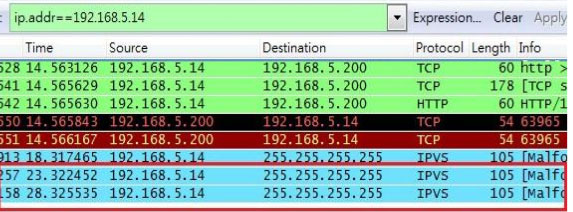
5. Wait for the moment of ending conversation, Wireshark then captures broadcasting packet only. (packet highlighted in red frame)
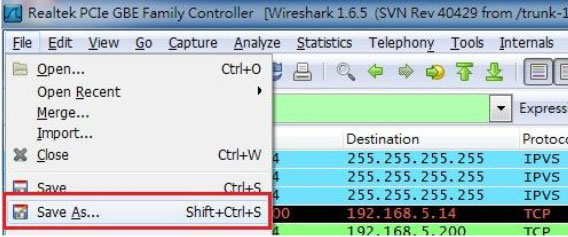
6. Stop the capturing process, and select File from the main menu and select Save As from the drop down menu.
7. Give a file name and select the packet range with All Packets and Displayed.
Windows Task Manager
Windows task manager is a task manager or system monitor application included with the Microsoft Windows NT family that provides limited information about the computer performance, the CPU usage, the memory information, the network activity and statistics, and the system services, etc. When a network camera performs poorly on an NVR, we may use Task Manager to clarify whether the limitation comes either from the PC spec or the network bandwidth capacity.
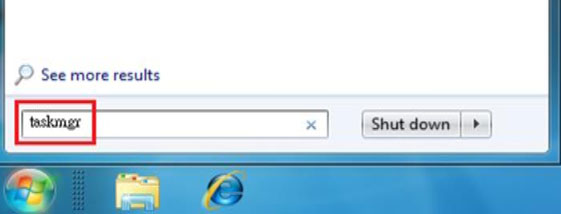
1. Click "Windows Start", and enter taskmgr in text box, the Tas Manager will be launched accordingly with a diagram displaying the Network utilization status.
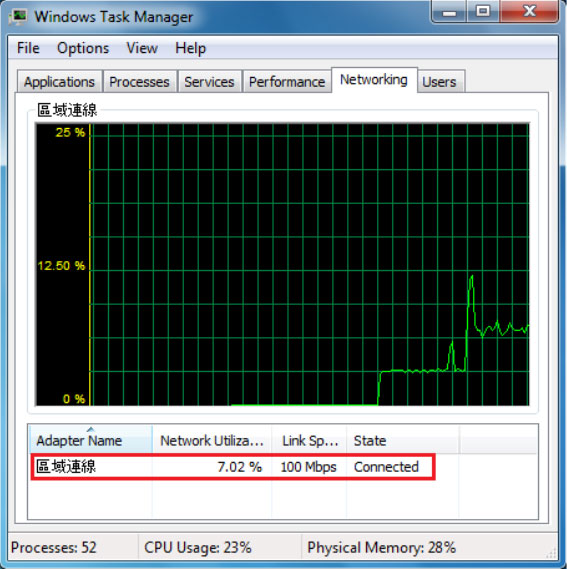
2. The Networking tab, introduced in Windows XP, shows statistics relating to each of the network adapters (or called NIC) present on the computer. By default, the adapter name, the percentage of network utilization, the link speed and the state of the network adapter are shown, along with a chart of recent activity.
Network utilization is critical factor to judge the traffic status, should be under 70%. If user site has bandwidth concern, user may calculate the consumed bit rate from this formula. For example, in this picture: 100Mbps (link speed) x 7.02% = 7.02Mb (bandwidth consumption).
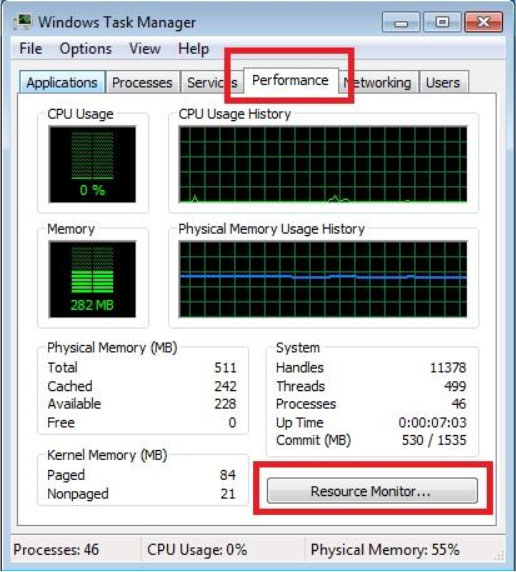
3. In Win7, it further supports resource monitoring the bandwidth utilization for specific applications. Click Resource Monitor in the Performance tab, the Resource Monitor dialog box is displayed with the Network tab selected. The Network Activity is shown.
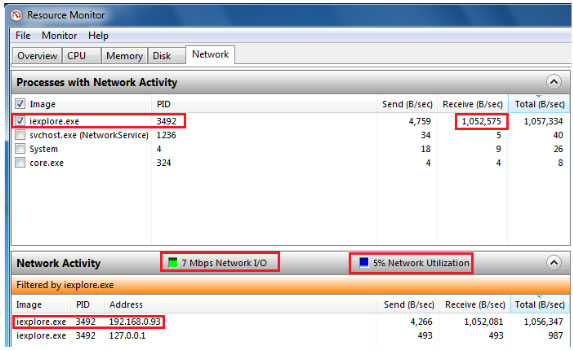
4. For example, to monitor the iexplore.exe application, the receive Byte 1052575 can be roughly converted to 7 Mbps Network IO, which equals to 5% of the Network Utilization Rate.
Windows Print Screen
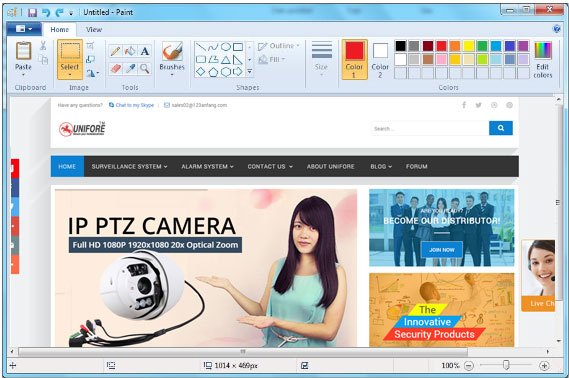
Windows Print Screen is commonly used in capturing setting detail of a camera or an NVR, or capturing the displayed image for tech support engineer to better evaluate the image quality issue. It's not recommended using digital cameras to capture image dispalyed on screen, because the image quality might be polluted by the environment lighting.
1. In Microsoft Windows, pressing Prt Sc Key will capture the entire screen, while pressing the Alt key in combination with Prt Sc key will capture the open window.
2. The captured image can then be pasted into an editing program such as a word processor or a graphics program.
Win7/8 Snipping Tool
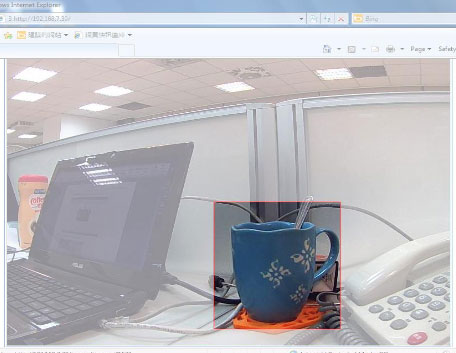
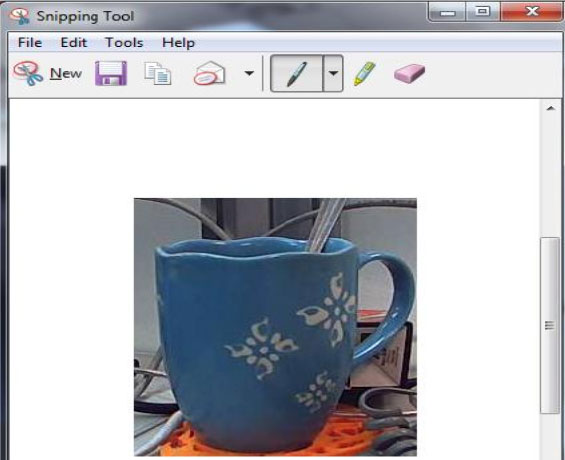
Snipping Tool is a screen-capture tool that allows taking screenshots (called snips) of an open window, rectangular areas, a free-form area, or the entire screen, Snips can then be annotated using a mouse or a tablet and saved as an image file (PNG, GIF, or JPEG file) or an MHTML file, or emailed.
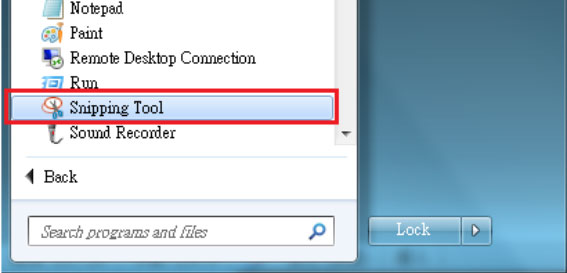
1. Launch program from Windows Start > all programs > Accessory > Snipping Tool
2. Taking a snapshot of a desired area.
3. Save the captured area.
Remote Desktop Software
When a user is unable to operate a network device properly, or unable to describe network detail for troubleshooting, a remote desktop application would be an efficient way for tech support engineers to do some work for users'site by remote controlling and desktop sharing over any kind of connection.
ShowMyPC Download Link: http://showmypc.com/
ShowMyPC
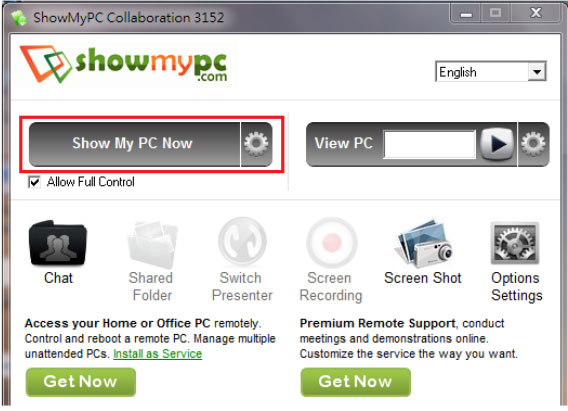
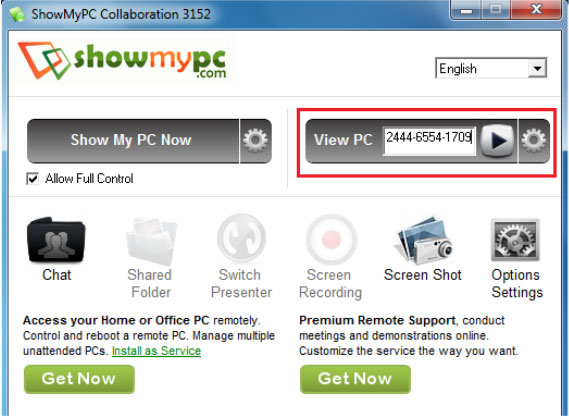
1. Click Show My PC Now on the remote computer.
2. Remote PC will generate a 12-digit Share Password.
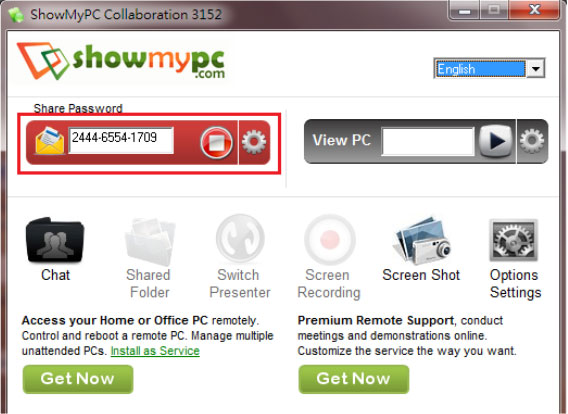
3. Enter the password in the View PC field on the master control computer. Click Play button to establish a connection from the remote computer to the master control computer.
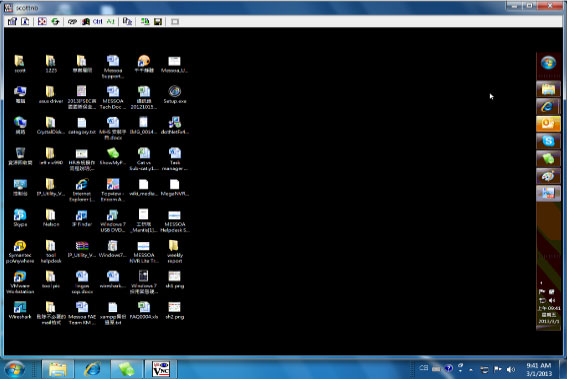
4. The desktop of the remote computer is shown on the master control computer successfully.
TeamViewer
Teamviewer Download Link: http://www.teamviewer.com/
1. When TeamViewer is started on the remote computer, it generates a set of ID and password automatically.
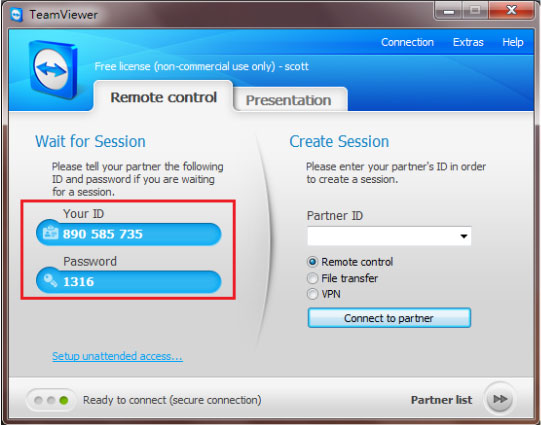
2. Enter the Partner ID on the master control computer. Then Click Connect to partner.
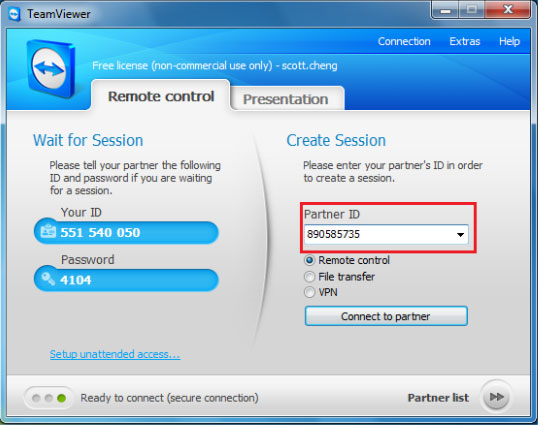
3. Enters the password of the remote computer and log on to establish a connection.
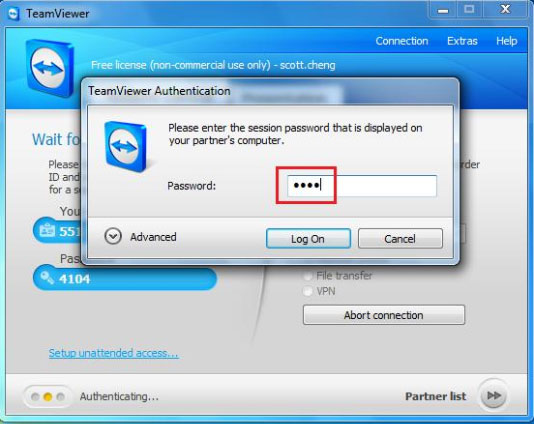
4. The desktop of remote computer is shown on the master control computer successfully.
Join.me
Join.me combines instant screen sharing and powerful meeting tools in an app that anyone can use to present, train, or demo. Join.me is designed to be intuitive and accessible, providing features that you will use every day for everything from show-and-tell to formal presentations.
Meeting host should have Join.me for Windows installed. Meeting participant should have browser, e.g. IE or Firefox with flash player installed.
Download Link: https://secure.join.me/Download.aspx?webdownload=true

1. To start meeting, the meeting holder opens join.me and presses share button to get a viewer link.

2. Copying and sending viewer link through instant messenger or email to invite participants to share with your screen.
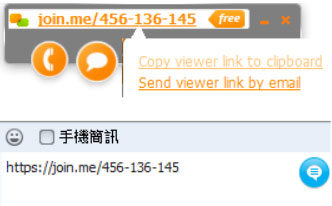
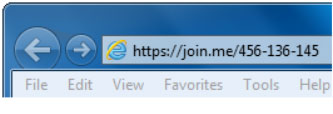
3. Participants open the IE browser and enter the link in URL text box, the screen of meeting holder will then be shared successfully.
Get My Latest Posts
Subscribe to get the latest updates.
Your email address will never be shared with any 3rd parties.