How to config WiFi setting of IP Camera
This article intends to guide you how to config WiFi of your network camera with step by step tutorial. If you recently purchased some professional WiFi network cameras, reluctant to read the manual, or the included manual is written with poor English language, hopefully this detailed instruction is helpful to you. Please note that the following method is only suitable for network cameras that based on Hisilicon solution. If you have network cameras based on Ambarrella or other solution, you may close this webpage.
There are two methods to config the WiFi setting of your network camera. Firstly, you can login camera's web interface, then navigate to setting tab and choose the WiFi setting to start. Alternatively, you can use the attached Device Manage Software to config it.
Method 1: Config WiFi on camera's web interface
Enter default IP address of your camera into Internet Explorer, the web interface will pop-up ActiveX plugin installation, it's mandatory to install it. Failed to install or download the ActiveX plugin? You may adjust the security setting on your IE10 or IE11.
To install the ActiveX plugin, you can read this article: http://www.hkvstar.com/technology-news/how-to-enable-activex-plugin-for-ip-camera-dvr-nvr.html
After installed ActiveX plugin successfully, you need to enter camera web interface with default account info (admin / empty password). Go to [DeviceCfg] > [Setting] > [System], you will find the [Netservice] menu.
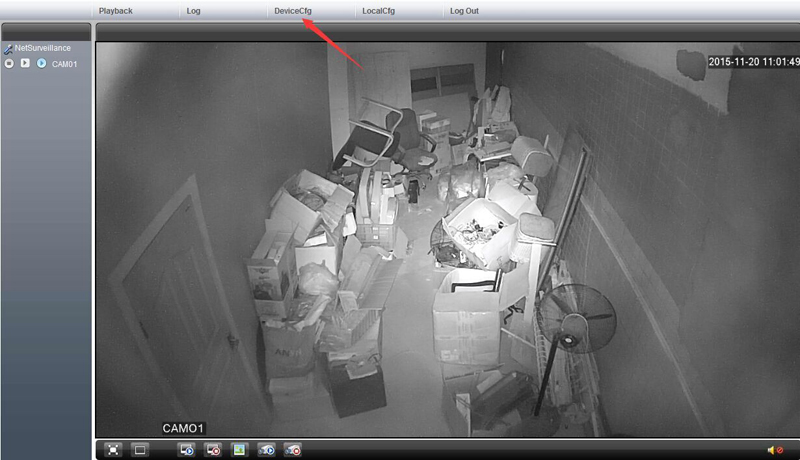
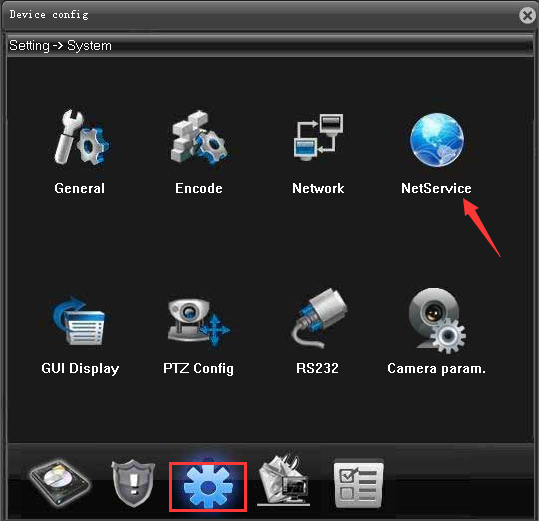
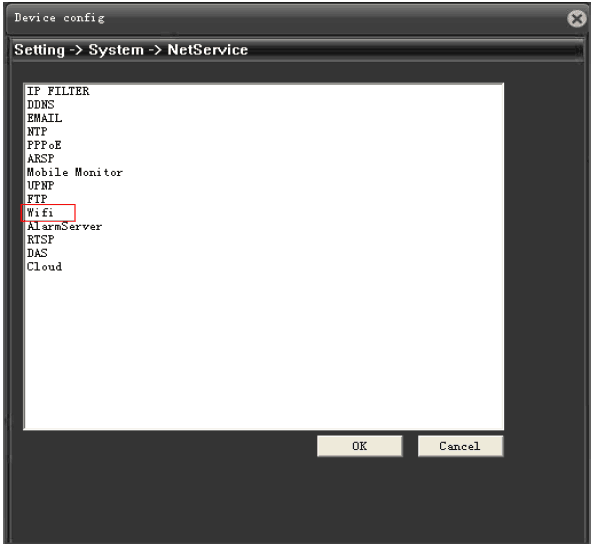
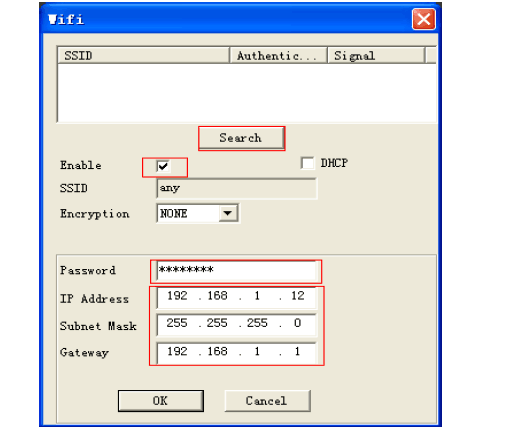
Click [WiFi], it will pop-up a WiFi setting window. This is the place where you can config WiFi setting of your camera. Click [Search], the network camera can automatically search available WiFi connections. Remember to use a unique local IP address, which can avoid IP-conflict, so that your camera can connect to local network properly.
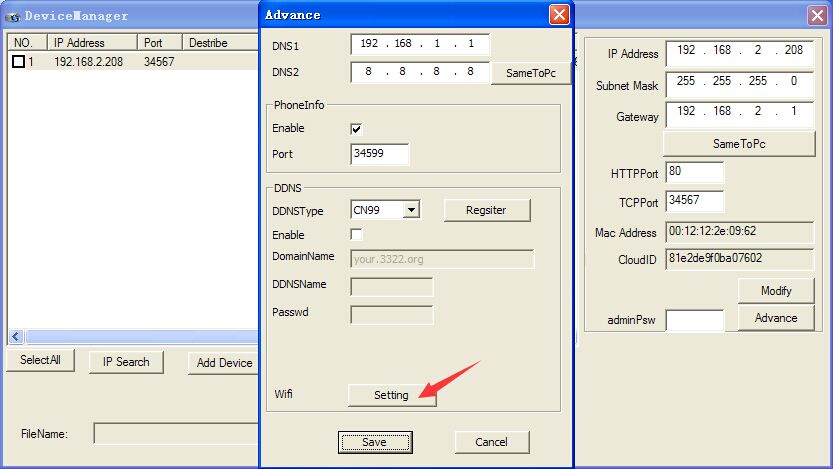
Method 2: Config WiFi using Device Manage Software
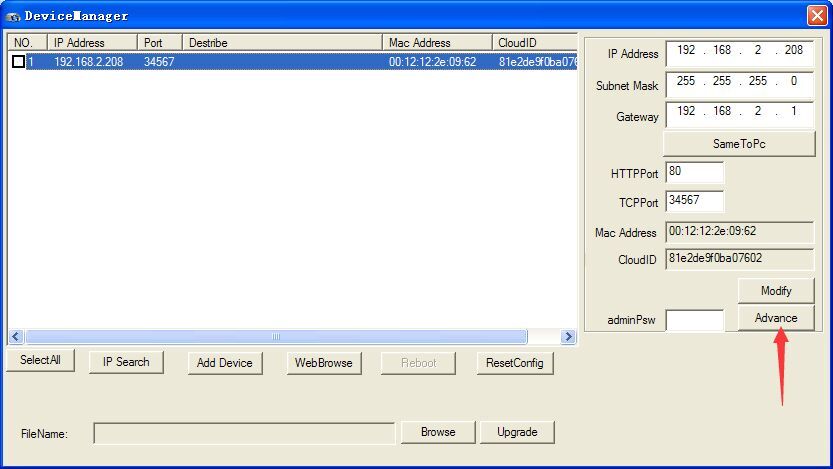
Our network cameras come with Device Manage Software which allows you to config local network cameras through PC remotely. You can find Device Manage Software in the CD. We assume that you lost your CD, you can download the software from below link:
{josociallocker} https://goo.gl/SY5Ift {/josociallocker}
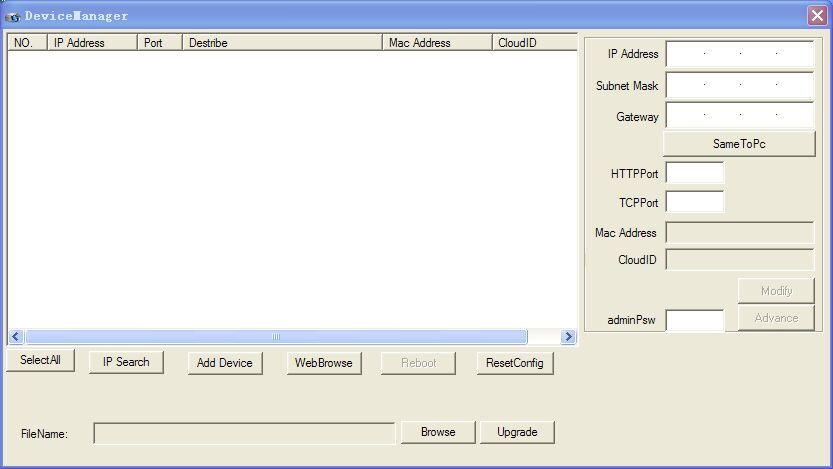
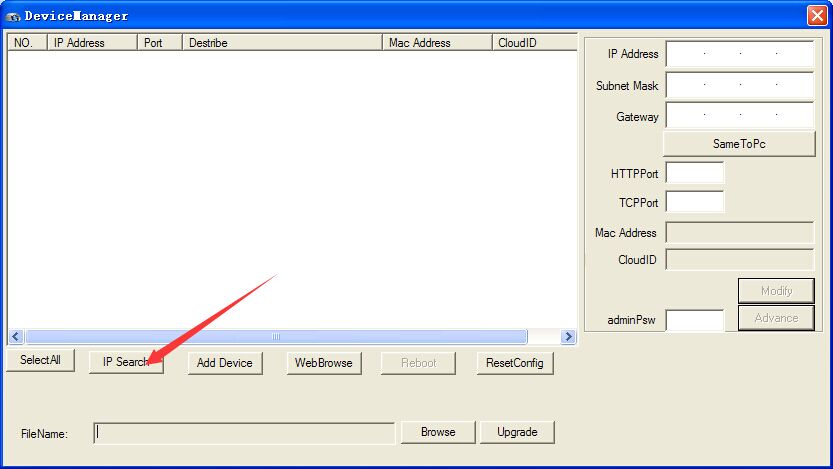
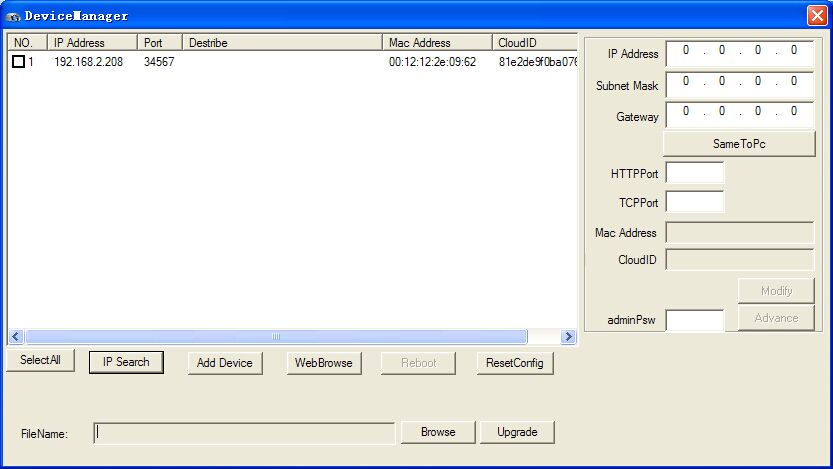
Install and Run the Device Manage Software, click [IP Search], the software will list the available network cameras.
If you want to know how to set Motion detection, FTP, Email alert etc function, you can use read this article: http://www.unifore.net/ip-video-surveillance/hi3518c-and-hi3518e-ip-camera-operation-guide.html
Get My Latest Posts
Subscribe to get the latest updates.
Your email address will never be shared with any 3rd parties.