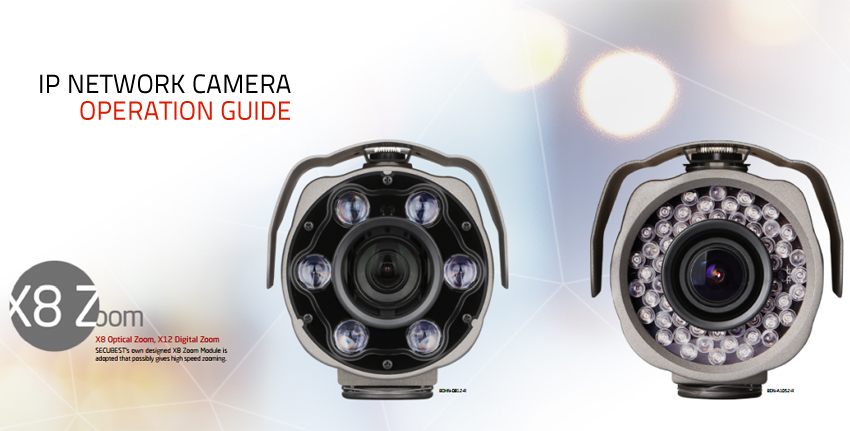
Hi3518C and Hi3518E IP Camera Operation Guide
Many IP cameras are based Hi3518C and Hi3518E. Hi3518C and Hi3518E are current popular chips from Hisilicon (a subsidiary of Huawei). Most of these security cameras share the similar interface or UI design. In this article, we intend to provide you a guide for the operation of Hi3518C and Hi3518E based network cameras.
1# How to upgrade IP camera firmware?
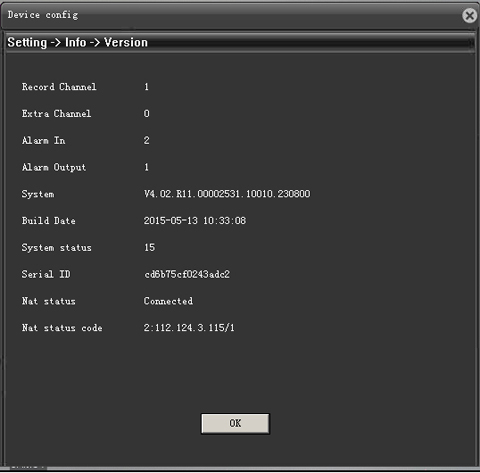
Before upgrading the firmware, you may need to know the existing version of firmware in your network camera. To check the firmware version, you should access and login camera web interface. Go to [DeviceCfg] > [Setting] > [Info] > [Version]
Ideally, you can get the latest firmware from your supplier. However, some suppliers may not be willing to provide you the latest firmware, since upgrading firmware involves risk that IP camera may stop working. Fortunately, now you can find the latest firmware from here: http://www.hkvstar.com/technology-news/china-ip-camera-configuration-firmware.html
2# Motion detection sends email with snapshot
The security camera supports motion detection sends email with snapshot.
Enable snapshot function
To enable this, go to [Setting] > [Record] > [Snapshot]
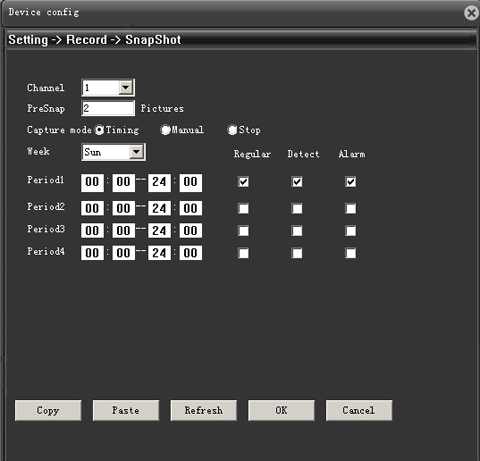
1. Channel can be selected, you can choose all.
2. Pre-record / Presnap is enabled as default.
3. Choose [Timing] in Capture mode.
4. Period option should choose [Detect], may uncheck [Regular] and [Alarm]
Set motion detection
Go to [Setting] > [Alarm] > [Video Motion]
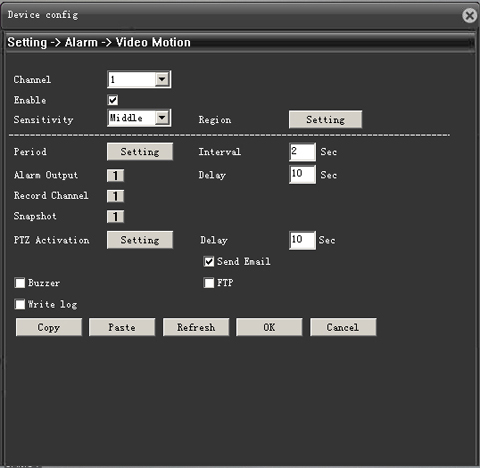
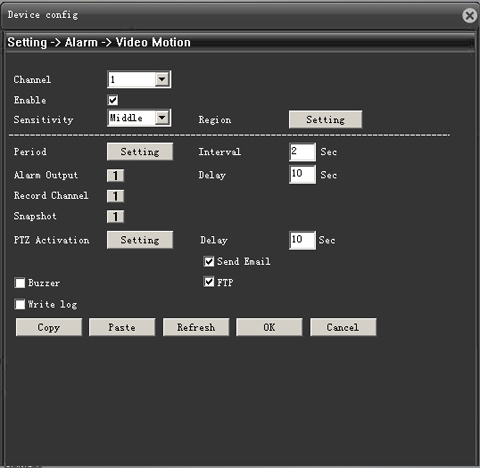
1. Click [Setting] on both Region and Period to select motion detection area and time.
2. Check [Record Channel] and [Snapshot] means camera detects motion will start recording and capturing snapshot.
3. Check [Send Email], to receive motion detection email alert with snapshot.
Note: Email alert only contains pictures, can't attach video clips.
Email / SMTP Setting
Set Email / SMTP setting, you should go to [Setting] > [System] > [NetService] > [Email]
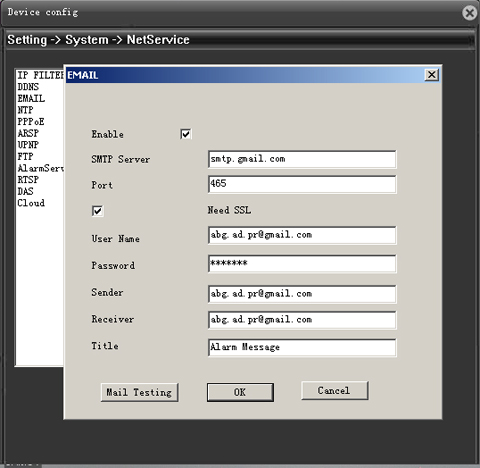
Note: Receiver can be multiple email addresses (up to 5), each email address should be separated with ";" (Semi-colon). After fill the form, you can click "Mail Testing" to check if camera can establish connection.
3# Enable NTP
Network Time Protocol (NTP) is a networking protocol for clock synchronization between computer systems over packet-switched, variable-latency data networks. Enable NTP, the network camera can sync time with remote server.
Time Sync with Remote Server
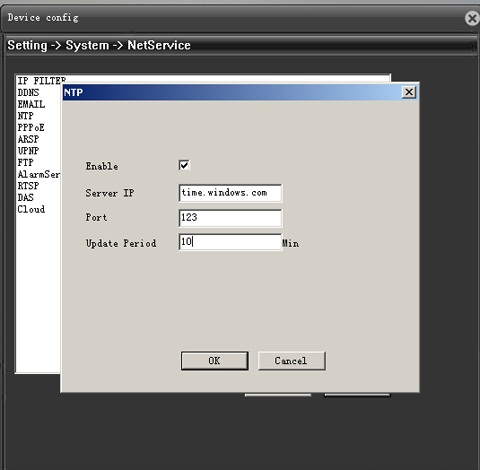
Go to [Setting] > [System] > [NetService] > [NTP]
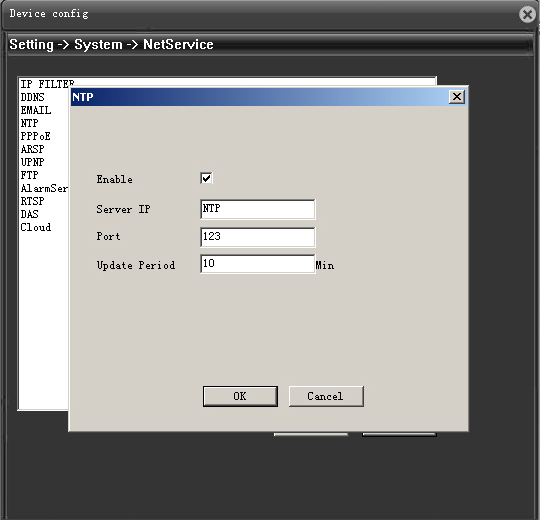
Check / enable NTP function, input an IP address in [Server IP]. In below picture, we use Microsoft Windows Time Server, the other options may keep default.
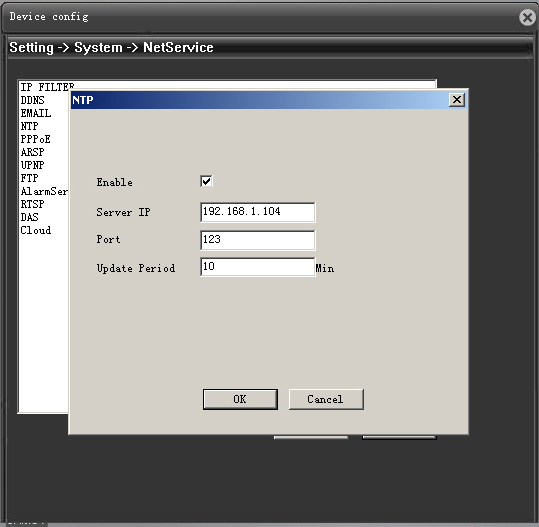
Sync with LAN computer
Fill your local computer's IP address (i.e. 192.168.1.104), then click "OK".
4# How to use FTP upload function?
FTP upload only works when use enabled motion detection.
1.1 Enable motion detection and FTP upload.
Go to [Setting] > [Alarm] > [Video Motion]

1.2 Enable snapshot function.
Go to [Setting] > [Record] > [Snapshot]
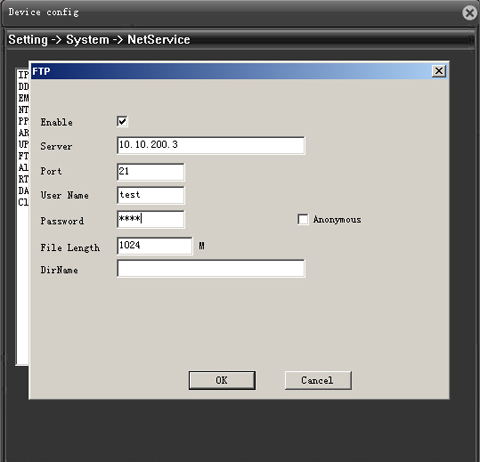
1.3 Enable FTP upload.
Go to [Setting] > [System] > [NetService] > [FTP]
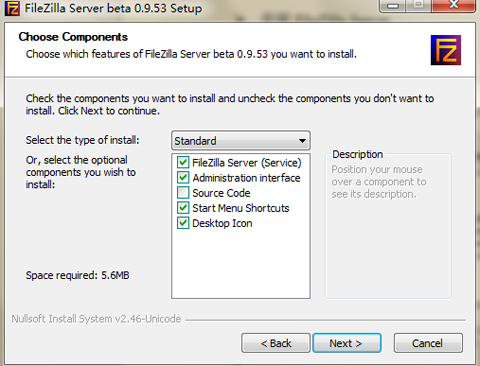
1.4 FileZilla Server FTP Setting
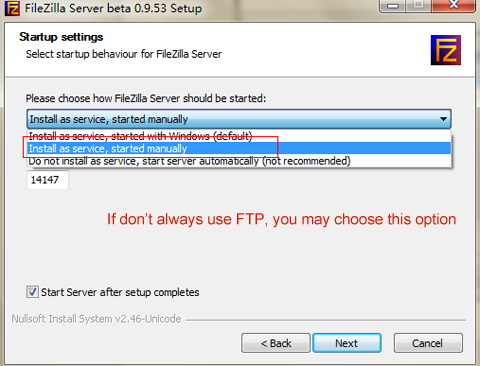
Step 1: Install FileZilla Server software in your computer
Step 2: Create a FileZilla User
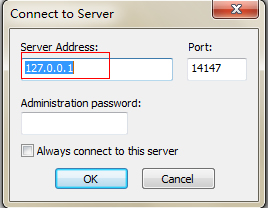
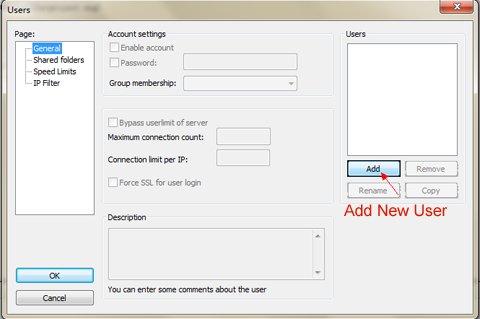
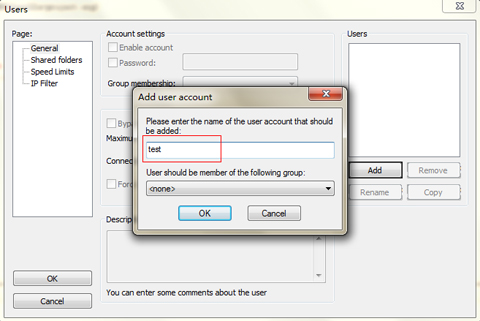
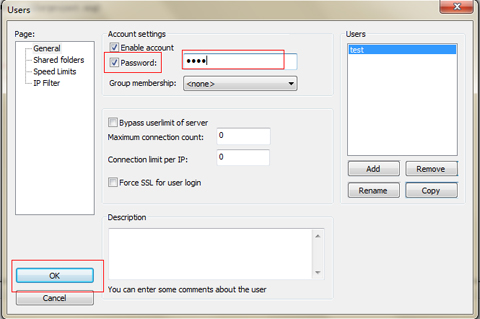
Step 3: Assign Folder & Permission to User
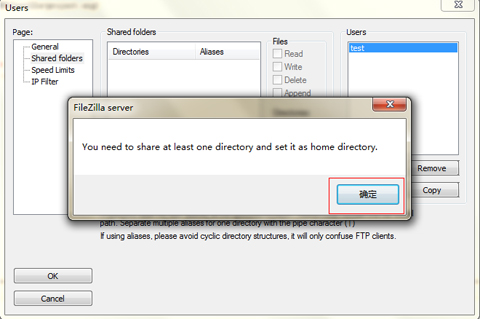
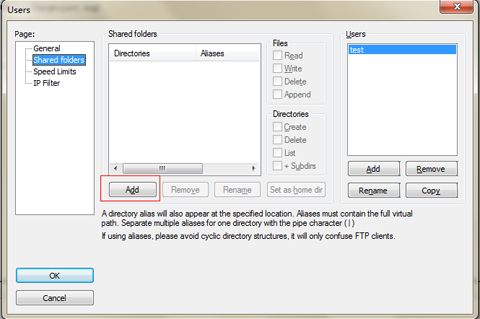
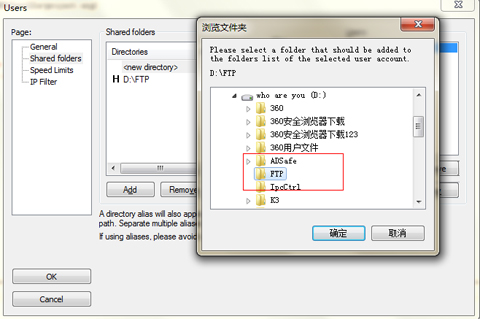
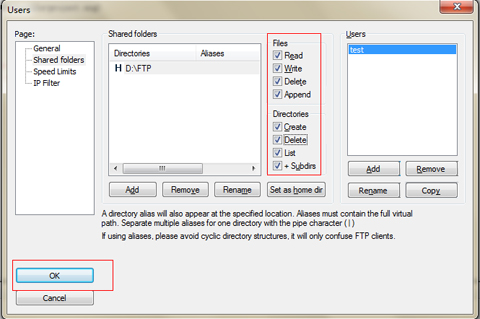
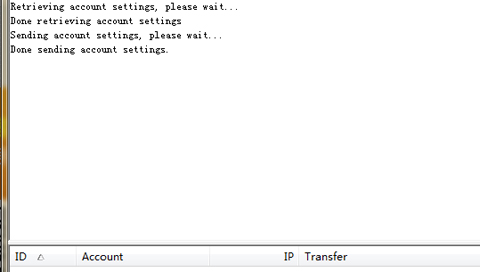
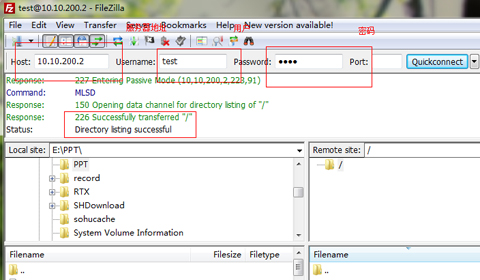
After setup the FTP server successfully, security camera can upload snapshot to remote server. You also can access this FTP account through FileZilla Client software or Internet Explorer.
1.5 Using FileZilla Client Software
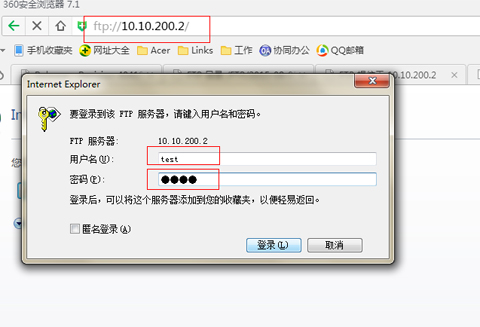
1.6 Login through Internet Explorer (or other browsers)
Type fpt://iipaddress into Internet browser, then input username and password to access FTP account.
Get My Latest Posts
Subscribe to get the latest updates.
Your email address will never be shared with any 3rd party.
Scan me


