HD NVR DDNS port forwarding configuration
If you want to remotely access your IP camera and NVR, you can use the DDNS function. DDNS is the abbreviation of dynamic domain name system. DDNS can convert your dynamic IP address to easy remember domain, so that you can remotely access the web interface of IP camera/NVR from anywhere, anytime. Since the DDNS is so widely implemented in all video surveillance products, the DDNS configuration is straightforward.
1#. Register a DDNS service
Register a DDNS service, here you can find the top free DDNS service providers. In this article, we use the free DDNS service from no-ip.com
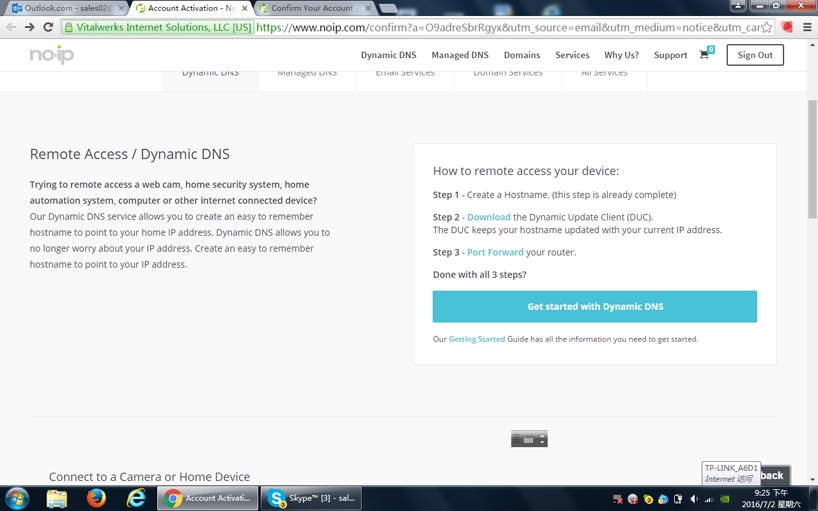
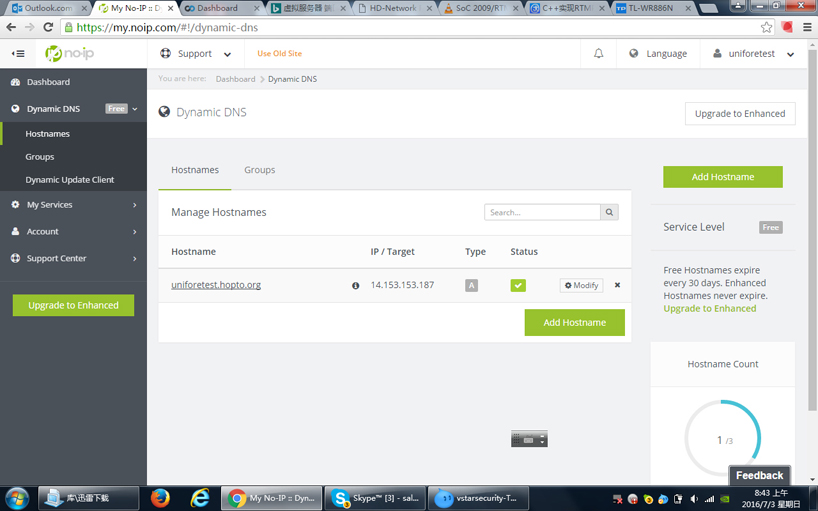
After the registration, you will have your own free domain (e.g. uniforetest.hopto.org), meanwhile the no-ip will show you the tutorial:
- Step 1 - Create a hostname. (this step is already complete).
- Step 2 - Download the Dynamic Update Client (DUC). The DUC keeps your hostname updated with your current IP address. (You don't need to download/use this tool, because IP cameras and NVRs have a DUC built-in.
- Step 3 - Port Forward your router.
2#. Port Forward on your router
Port forwarding is a the process of configuring a router to make a computer or other network device that is connected to it accessible to other computers and network devices from outside of the local network. Port forwarding uses an IP address plus port number to route network requests to specific devices.
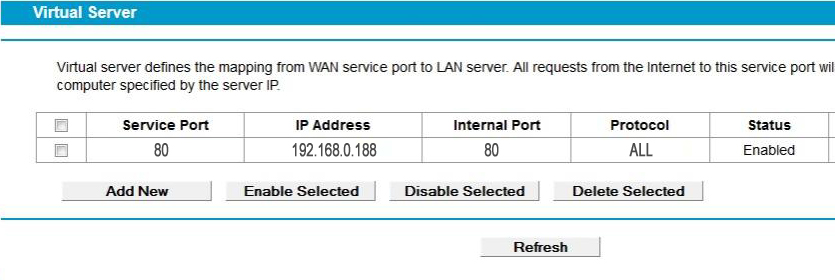
You need to do the port forward for the IP address of NVR or IP camera. For example, the NVR's local IP address is 192.168.0.188 (or default 192.168.1.188), then you need to go to router port forward/virtual server setting, add a port forwarding rule.
3#. DDNS setting on NVR
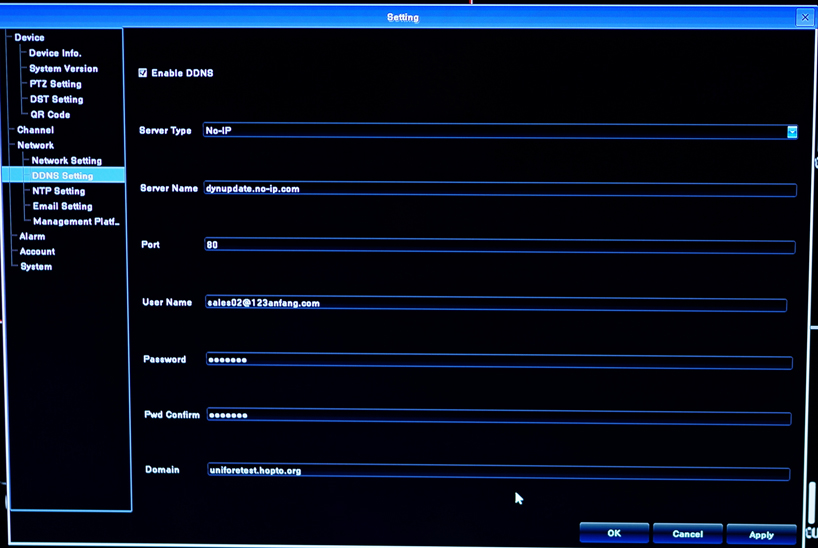
Login your NVR, go to [Setting] > [Network] > [DDNS Setting], check the [Enable DDNS], then choose the [No-IP] from the server type.
Fill your no-ip account information (your email and password) and domain.
- Server Type: No-IP
- Server Name: dynupdate.no-ip.com
- Port: 80
- User Name: This email address is being protected from spambots. You need JavaScript enabled to view it.
- Password: ******
- Pwd Confirm: ******
- Domain: uniforetest.hopto.org
4#. Adding IP camera to HD NVR
Making sure both IP cameras and the HD NVR, computers connect to the same router, also in the same local network. To make sure they are in the same network, users need to check the network setting of each devices.
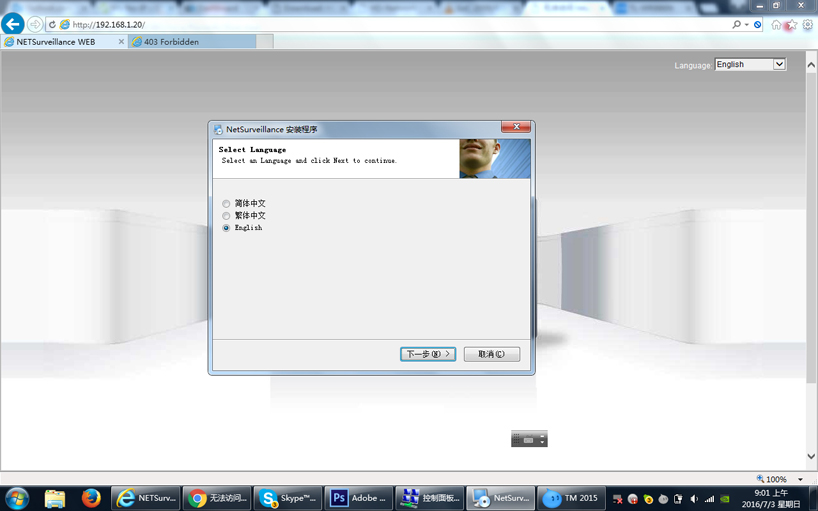
Typing the default IP camera address (192.168.1.20) to visit its web interface, first accessing the IP camera, NetSurveillance ActiveX plugin (http://xmsecu.com:8080/ocx/NewActive.exe) should be installed. In order to install the ActiveX plugin, users may change the Internet security setting of Internet Explorer (IE).
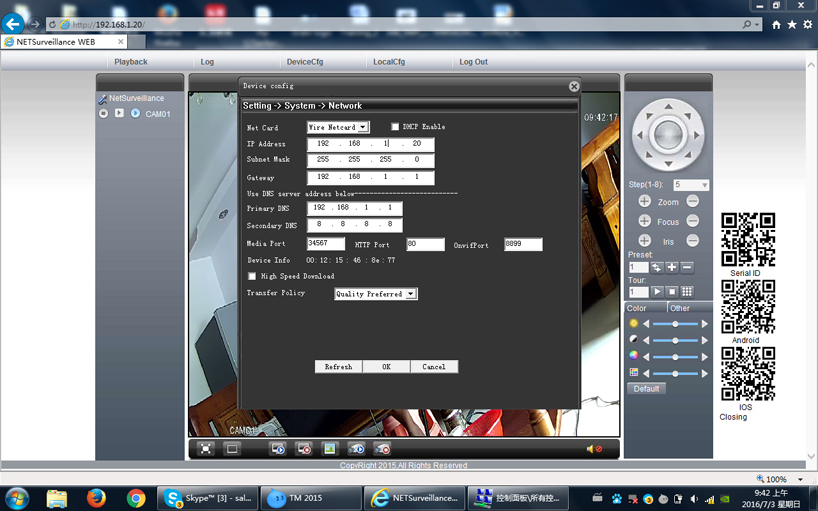
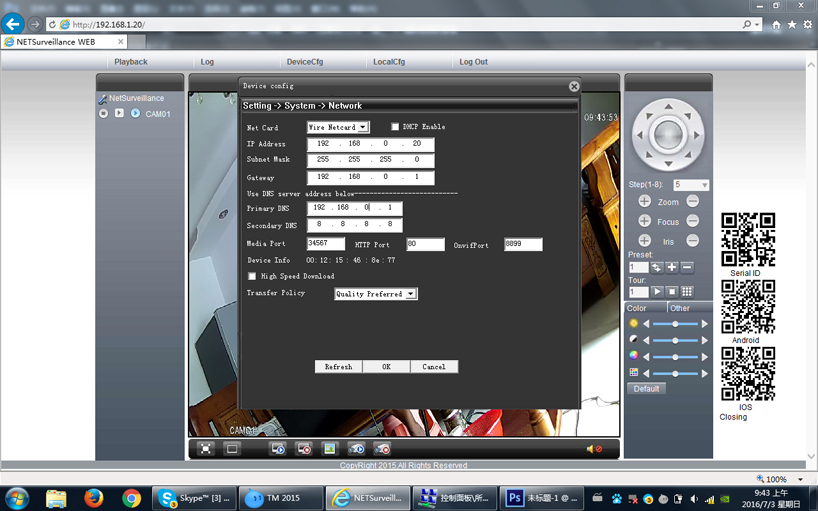
For example, the IP camera network setting:
- IP address: 192.168.0.21
- Sub-mask: 255.255.255.0
- Default gateway: 192.168.0.1
The NVR network setting:
- IP address: 192.168.0.188
- Sub-mask:255.255.255.0
- Default gateway: 192.168.0.1
It's recommended to disable DHCP function, manually configure the network setting for each devices, making sure each devices have a unique IP address to avoid IP address conflict. As long as the IP cameras in the same local network, users can add IP cameras to the NVR by using different communication protocols (i12, ONVIF).
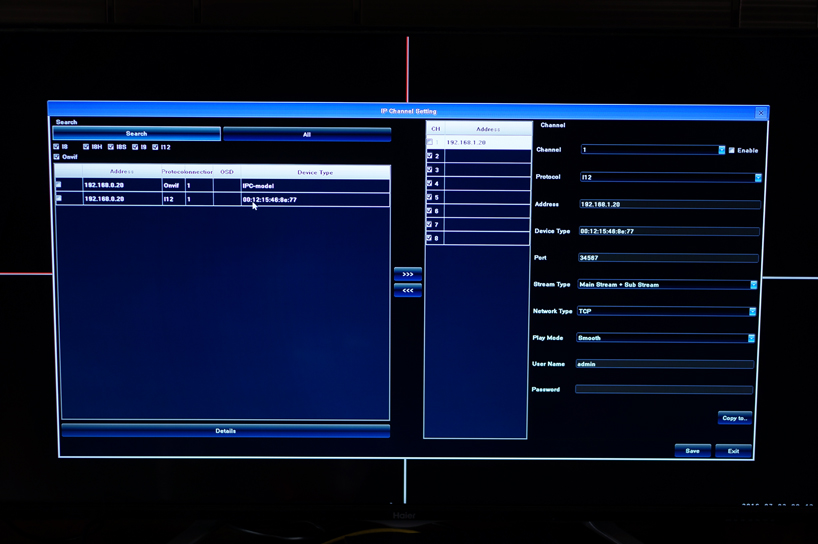
- I12: Motion detection & privacy mask function work properly.
- ONVIF: Motion detection can work, privacy mask function can't work properly.
Get My Latest Posts
Subscribe to get the latest updates.
Your email address will never be shared with any 3rd parties.